
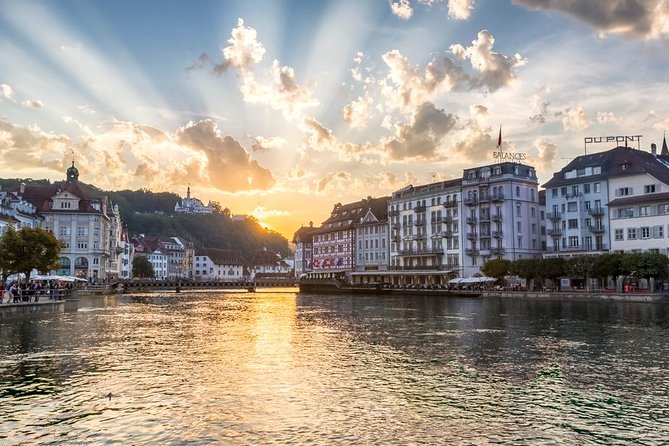
Reviewed · PHOTOGRAPHY SESSIONS
Best of Lucerne Walking Photography Tour
Lucerne turns your camera into a storyteller. This 2-hour walking tour pairs a photographer guide with a small group of up to 8, so you get practical framing tips for Chapel Bridge, lake views, and the city’s towers. The only real drawback is that you will walk uphill, so plan for moderate fitness.
What makes it work is the pace. You start at 3:00 pm, follow a tight route of major landmarks, and you stop to shoot at a photo level, not a sightseeing sprint. The guide keeps the timing flexible based on the group, so you are not just moving from point A to point B.
And yes, you do not need a fancy rig. The tour welcomes all camera skills, from compact cameras to a smart phone, and you’ll still get useful coaching on how to capture the best angles. In one example from a DSLR user with a Nikon D7200, the guide was patient with lens swaps and helped get the shot right.
In This Review
- Key highlights and what to expect
- Why This Lucerne Photo Walk Beats a Typical Sightseeing Route
- Meeting Point and Timing: Getting Started Without Stress
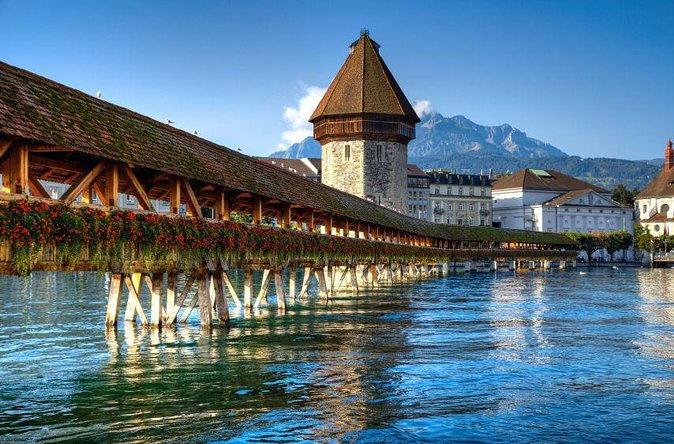
- Chapel Bridge Stop: How to Frame Lucerne’s Most Famous Landmark
- Lake Lucerne and the Swiss Alps: Shooting Wide Views That Still Look Sharp
- City Wall and Nine Towers: Turning Fortification Details Into Strong Compositions
- City Castle Panorama: The Payoff View and the Climb to Earn It
- Ancient Wall Walk and Alpine Panoramas: Walking as Your Camera Move
- Fortification Area and the Wall Walk Rules: Summer Three Towers, Winter Nine
- Chaff Bridge and Lucerne’s Final Swiss Monument Stop
- Price and Value: What You Get for $212.65 in 2 Hours
- Who This Tour Suits Best (and Who Might Want Another Option)
- Should You Book the Best of Lucerne Walking Photography Tour?
- FAQ
- What time does the Lucerne photo walking tour start?
- How long is the tour?
- What is the group size limit?
- Where is the meeting point?
- Is the tour offered in English?
- Do I need a certain camera type or photography skill level?
- Is food or drinks included?
- Can I get a full refund if I cancel?
Key highlights and what to expect
- Up to 8 people means you can actually ask questions and get real feedback
- Chapel Bridge photo coaching includes history plus practical composition tips
- Lake Lucerne and Swiss Alps views focus on how to frame wide scenery
- City wall and nine towers turn a defensive landmark into a strong photo subject
- Seasonal fortification route swaps between three-tower wall walks (summer) and broader views (winter)
- Bring a smart phone or a DSLR since the guide works with what you have
Why This Lucerne Photo Walk Beats a Typical Sightseeing Route
I like tours that make you slow down in the right places. This one is built around seeing Lucerne as a set of photography problems. How do you frame a long covered bridge? How do you shoot stone towers without everything looking flat? What do you do when the lake is throwing reflections back at you?
That is the payoff of having a professional photographer guide, because you get guidance that is immediately usable. Instead of just hearing where things are, you learn how to look. And since the group is capped at 8, it does not feel like herding cats with cameras.
You also get a real mix of scenes in a short time. In one 2-hour walk, you bounce between medieval-looking structures, water-and-mountain views, fortification walls, and viewpoints. Feet do the walking, eyes do the sorting, and your camera does the storytelling.
More Photo Tours in Lucerne
- Private Lucerne Old Town Tour w/ Local Guide & Photographer
★ 5.0 · 13 reviews - Lucerne by Night Photo Tour
★ 5.0 · 9 reviews - Private Lucerne Old Town Tour – Local Guide & Photographer
★ 5.0 · 8 reviews
Meeting Point and Timing: Getting Started Without Stress
You meet at Torbogen LuzernBahnhofpl., 6003 Luzern, Switzerland, and the tour ends back at the same spot. Starting at 3:00 pm matters because late afternoon light can be kind to both stone and water, and it often gives you a more flattering look than mid-day glare.
The good part for planning: it’s near public transportation, so you are not stuck figuring out a complex pickup. The tour also uses a mobile ticket, which keeps things simple once you arrive.
One practical note: since the route includes uphill segments, it helps to wear comfortable shoes. You do not need hiking boots, but you should be ready for steady climbs along the old walls.
Chapel Bridge Stop: How to Frame Lucerne’s Most Famous Landmark
The first big target is the Chapel Bridge, with time spent photographing and learning its history. This stop is less about taking one photo and moving on, and more about learning how to see it in different ways.
Chapel Bridge is the kind of subject that invites common mistakes. The temptation is to shoot straight-on from the crowd, which makes it hard to show depth. The photo guide approach helps you think about angle and layers: bridge wood and stone details up close, then the bridge length stretching into the scene, then whatever background elements you can include to add depth.
If you have a zoom lens, this is a good moment to test it. Try tightening the frame so the bridge becomes the main subject. If you are using a phone, you can still work with framing and distance by stepping a little left or right until the bridge lines feel balanced.
The tour is also structured so the group decides how long the Chapel Bridge stop takes. That means you are not forced to abandon your angle before you feel ready.
Lake Lucerne and the Swiss Alps: Shooting Wide Views That Still Look Sharp
After the bridge, you shift to lake views and the Swiss Alps. This is where the tour earns its keep as a photography outing, because wide scenery can get messy fast if your framing is off.
The key challenge is proportion. In mountain-and-water views, the sky, the lake, and the peaks can all compete for attention. Your best shots usually come from choosing one main idea: either the mountains as the anchor, or the lake as the reflective foreground, or a composition that uses both but clearly separates them.
Expect the guide to nudge your thinking on where to place the horizon and how to keep the scene from looking washed out. Late afternoon can help, but you still want to be careful with glare and strong reflections. If you are shooting on a phone, keep an eye on auto-exposure. If the lake looks too bright, you can often adjust exposure using your phone’s interface.
This stop also gives you variety. If you started with a medieval bridge, lake-and-alps framing resets your eye and makes the final wall panoramas feel like a natural progression instead of repeat architecture.
More Walking Tours in Lucerne
- Lucerne: Private Walking Tour with a Local Guide
★ 4.6 · 450 reviews - Lucerne Walking & Boat Tour: The Best Swiss Experience
★ 4.5 · 417 reviews - Lucerne: Guided Walking Tour with an Official Guide
★ 4.7 · 321 reviews - Exclusive Private Lucerne Walking Tour with Local Guide 3 Hours
★ 5.0 · 80 reviews
City Wall and Nine Towers: Turning Fortification Details Into Strong Compositions
Next you focus on the city wall with its nine original middle ages towers. This is a fun stop because towers give you patterns, rhythm, and texture. It is not just a landmark, it is a composition lesson.
Why it helps to have coaching here: walls and towers are full of repeating shapes. Without guidance, you tend to shoot a general wide view and end up with a frame that feels like a postcard. With a photographer’s eye, you can look for detail shots too, like how the tower forms stack against the background, or how the curve of a wall changes the perspective.
The tour style is to keep you moving through the walls and viewpoints, but you still get time to stop and shoot. That lets you try multiple approaches without falling behind the group.
If you are bringing a compact camera or phone, this is a good place to test how your device handles detail. Bright stone can trick some cameras into over-sharpening or flattening textures, so take a second to check your image on the screen and adjust.
City Castle Panorama: The Payoff View and the Climb to Earn It
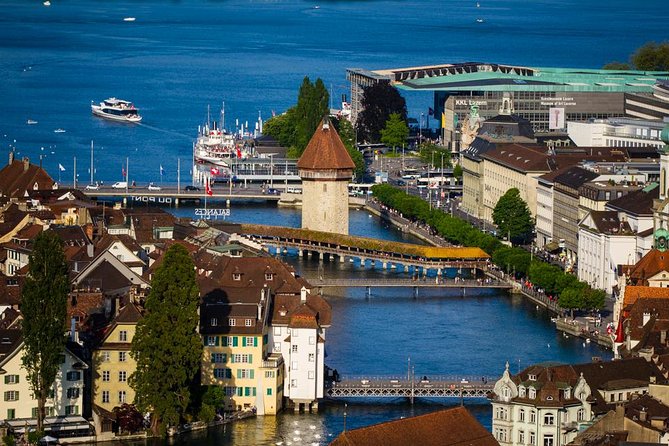
The itinerary then includes a visit to the city castle and a chance to capture the best panorama view of Lucerne, lake, and mountains. This is where the uphill effort starts to pay you back.
Panorama viewpoints are tricky because they lure you into one big shot that does not communicate much. The guide helps you think about layering again. You want a clear foreground, a defined middle (often buildings or the lake), and the peaks in the background. Even in a short framing, you can create depth by including a bit of nearby detail.
Also, do not ignore the practical side: you are climbing. That means your breathing and your camera steadiness matter. If you are shooting handheld, take a moment before pressing the shutter. Stand, settle, and shoot calmly instead of snapping photos while moving.
The city castle stop is also one of the best moments to switch from details to overall impact. If you have been photographing towers and bridges close up, this panorama helps round out the set and gives you a hero image.
Ancient Wall Walk and Alpine Panoramas: Walking as Your Camera Move
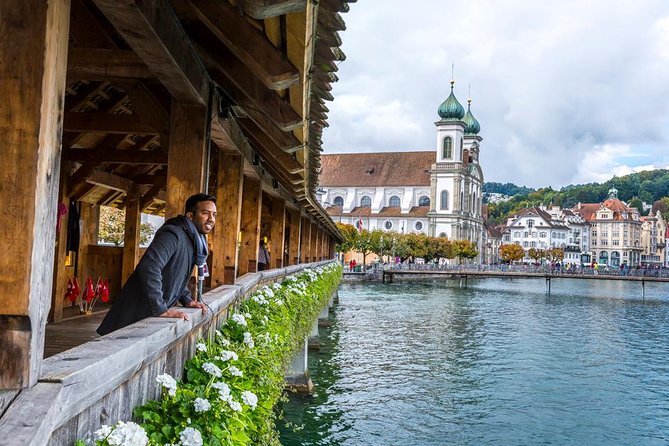
One of the most memorable segments is walking along the ancient wall of Lucerne, including an uphill stretch for alpine panoramic views. This is not a quick stroll. It is built into the tour on purpose, because altitude changes what your camera can capture.
As you move along the wall, the angle changes naturally. That makes it easier to get different perspectives without forcing awkward positions. In other words, your footsteps do part of the work for you.
Here is how to get more out of it. Slow down during your photo pauses. Notice how the line of the wall pulls the eye. Then look for a view where the lake and the mountains both appear, not just one. Your best images usually come from frames that show the city in context, not just a single landmark.
This section also fits the tour’s overall theme: it is not only about taking photos, it is about learning how a route shapes what you can photograph.
Fortification Area and the Wall Walk Rules: Summer Three Towers, Winter Nine
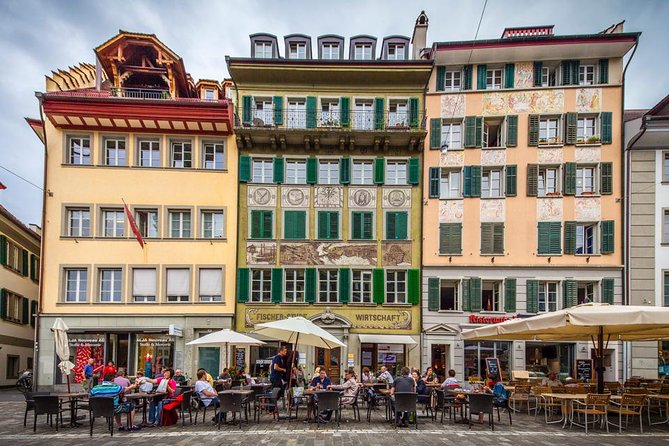
Then you explore the fortification area, walking on the wall along three towers in summer time. In winter, the walk changes to admire the 9 towers and the wall.
This seasonal swap is a big deal for your expectations. If you book in summer, plan for the tour to focus on a more specific trio of towers along the wall. If you book in winter, plan for a broader wall-and-towers viewing approach, which can change what angles are easiest and how long you spend in each shooting zone.
Either way, the fortification area is where you can get some of the most architectural, almost graphic images. Towers create vertical elements. The wall creates lines. Your job as the shooter is to use those shapes to build a frame that feels intentional.
If you like detail photography, this is your zone. If you like wide scenic frames, the wall positions can still give you panoramic views. The guide’s job is to help you choose which direction to shoot so you leave with more than one type of photo.
Chaff Bridge and Lucerne’s Final Swiss Monument Stop
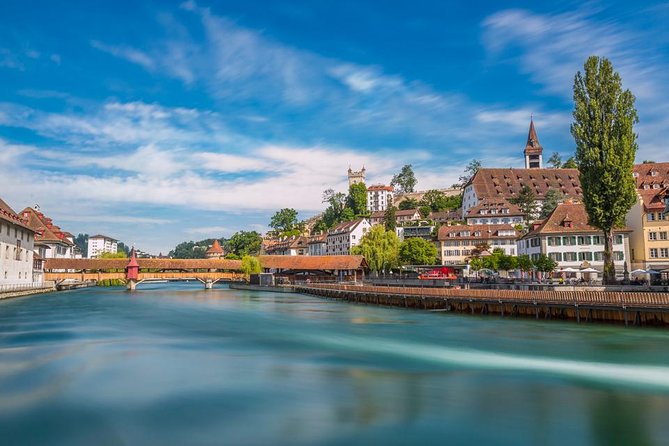
Next, you learn about the Chaff bridge and enjoy its beautiful design. Earlier you focused on the Chapel Bridge, so this is another moment where the guide can help you compare different structures and how each one behaves visually.
Bridges often create a built-in leading line, but they also tempt you into repetitive shots. The best way to avoid that is to vary your composition. Try one shot that includes the bridge as a full subject. Then try one that focuses on a design detail, like repeating segments or the bridge’s form against the background.
Finally, the tour ends with a stop to discover the beauty of the most important Swiss monument. The exact monument is not described in the tour details you provided, but the intent is clear: you finish with a major Lucerne landmark that gives your photo set closure. It also works as a reset point. By this stage, you have shot bridges, walls, and panoramas, so the last stop helps you balance your final images.
Price and Value: What You Get for $212.65 in 2 Hours
The price is $212.65 per person for an approximate 2-hour tour. That is not cheap compared with a generic walking tour, but it is also not trying to be one. You are paying for a professional photographer guide, a small group limit, and on-the-spot photography tips.
Here is the value logic I use when deciding if this is worth it. If you can only ask for help once during your trip, paying for guided coaching can save you hours of trial and error. The small group size matters because you are more likely to get answers to your specific questions, not just general advice.
It is also booked well in advance on average, about 49 days ahead. That tells me the tour is popular, likely because people want more than just photos of famous spots. They want a better shot, faster.
If you are an experienced photographer, the tour can help you refine framing choices in a compact route. If you are newer, it can teach you how to approach common subjects in a city like Lucerne, without overcomplicating camera settings.
What is not included is also important for value. Food and drinks are not included, and transportation costs are not included unless mentioned. So budget for a snack or water stop on your own if you need it.
Who This Tour Suits Best (and Who Might Want Another Option)
This is ideal if you want better photos without spending a whole day learning camera theory. You will be walking, but the group size stays small and the route hits the landmarks that people actually want to photograph in Lucerne.
It also suits you if you:
- want Chapel Bridge and lake-and-mountains shots in one outing
- like architecture, walls, and towers as photo subjects
- enjoy learning practical techniques while walking
- have any camera type, from smart phones to compact to DSLR
It may be less ideal if you:
- struggle with uphill walking or moderate fitness demands
- expect a mostly flat, stroller-friendly route
- want time to wander far off the main landmark cluster
The best fit is someone who wants to work with a guide to get images they feel proud of, quickly, without turning the trip into a full photography course.
Should You Book the Best of Lucerne Walking Photography Tour?
If you care about getting photos you can actually use, print, or share, I think this tour is a strong pick. The mix of Chapel Bridge, Lake Lucerne with Swiss Alps views, fortification walls with nine towers, and a final landmark stop gives you variety in a short window. The small group and professional guide style make it feel like coaching, not just a walk with a history lecture.
Book it when you want a structured photo route and you are comfortable with uphill walking. Skip it if you want a relaxed, meandering city tour with no focus on composition.
If you do book, come ready to shoot. Be patient with your first frames. Lucerne is photogenic, but the guide’s tips will help you turn that photogenic nature into images with intent.
FAQ
What time does the Lucerne photo walking tour start?
It starts at 3:00 pm.
How long is the tour?
The duration is approximately 2 hours.
What is the group size limit?
The tour has a maximum of 8 travelers.
Where is the meeting point?
The meeting point is Torbogen LuzernBahnhofpl., 6003 Luzern, Switzerland.
Is the tour offered in English?
Yes, it is offered in English.
Do I need a certain camera type or photography skill level?
No. All camera skills are welcome, and a compact, professional camera, or even a smart phone is fine.
Is food or drinks included?
No, food and drinks are not included.
Can I get a full refund if I cancel?
Yes. You can cancel for a full refund up to 24 hours before the experience’s start time.
Newly reviewed around Lucerne
- Zurich: Adventure to Lucerne & Pilatus Gold or Silver tour★ 4.8 · 8 reviews
- Private Transfer: Lucerne to Zurich Airport ZRH by Business Car★ 5.0 · 11 reviews
- Private Transfer: Lucerne to Zurich Airport ZRH by Luxury Van★ 4.5 · 6 reviews
- The Lives and Legends of Lucerne: A Self-Guided Audio Tour★ 5.0 · 6 reviews
- Walking Tour – Around the Old Town Lucerne★ 3.5 · 3 reviews
- Touristic highlights of Lucerne on a Private half day tour with a local★ 4.0 · 5 reviews
- Natural Wonders of Switzerland from Lucerne (1 Day Private Tour)★ 5.0 · 21 reviews
- Revealing Lucerne: Self-Guided Audio City Tour★ 4.0 · 20 reviews
Photography Sessions, compared.
DAVOS: Paragliding Tandem Flight In Swiss Alps (Video & Photos Included)
Read our review →
DAVOS: Paragliding For 2 Passengers – Together In The Air! (Video&Photos Incl.)
Read our review →

Private Lucerne Old Town Tour w/ Local Guide & Photographer
Read our review →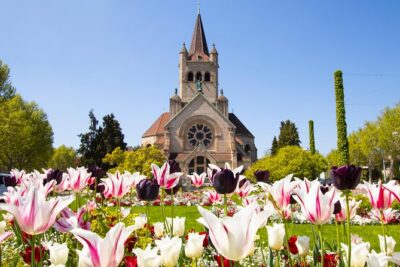
Discover Basel’s most Photogenic Spots with a Local
Read our review →
Discover Interlaken’s most Photogenic Spots with a Local
Read our review →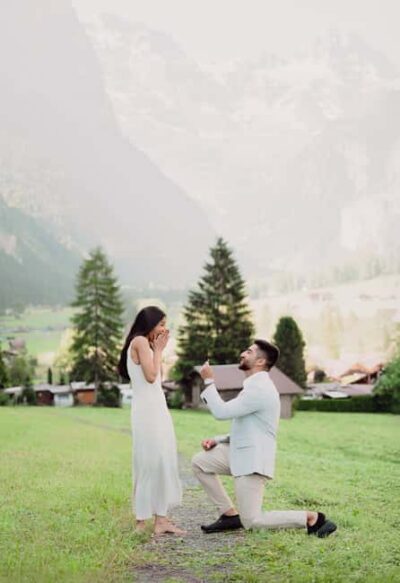
Lauterbrunnen & Wengen: Photoshoot at the best spots.
Read our review →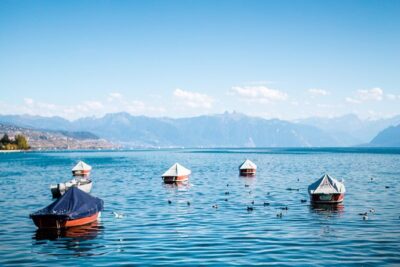
Discover Lausanne’s most Photogenic Spots with a Local
Read our review →Browse the lists this tour appears in